
When managing routine maintenance and servicing aboard a boat, most cruisers have a solid list of things to do; service the engines, clean the hull, restock spares, test the bilge pumps and so on. On this list should be a check of one of the most critically important systems onboard; the rig.
Sadly, mast failures are more common than you might think. Over the past few years, Pantaenius has received hundreds of rig-related claims, many of them resulting in major damage, and some in injury. From bent rigging screws to failed furling systems, the causes can vary, but in many cases the damage could have been prevented. It’s why regular inspections, both professional and DIY, are essential for anyone planning to sail away.
Using industry data, let’s take a look at why rigs can fail, how you can check your own and when it might be advisable to have a professional step in.
-

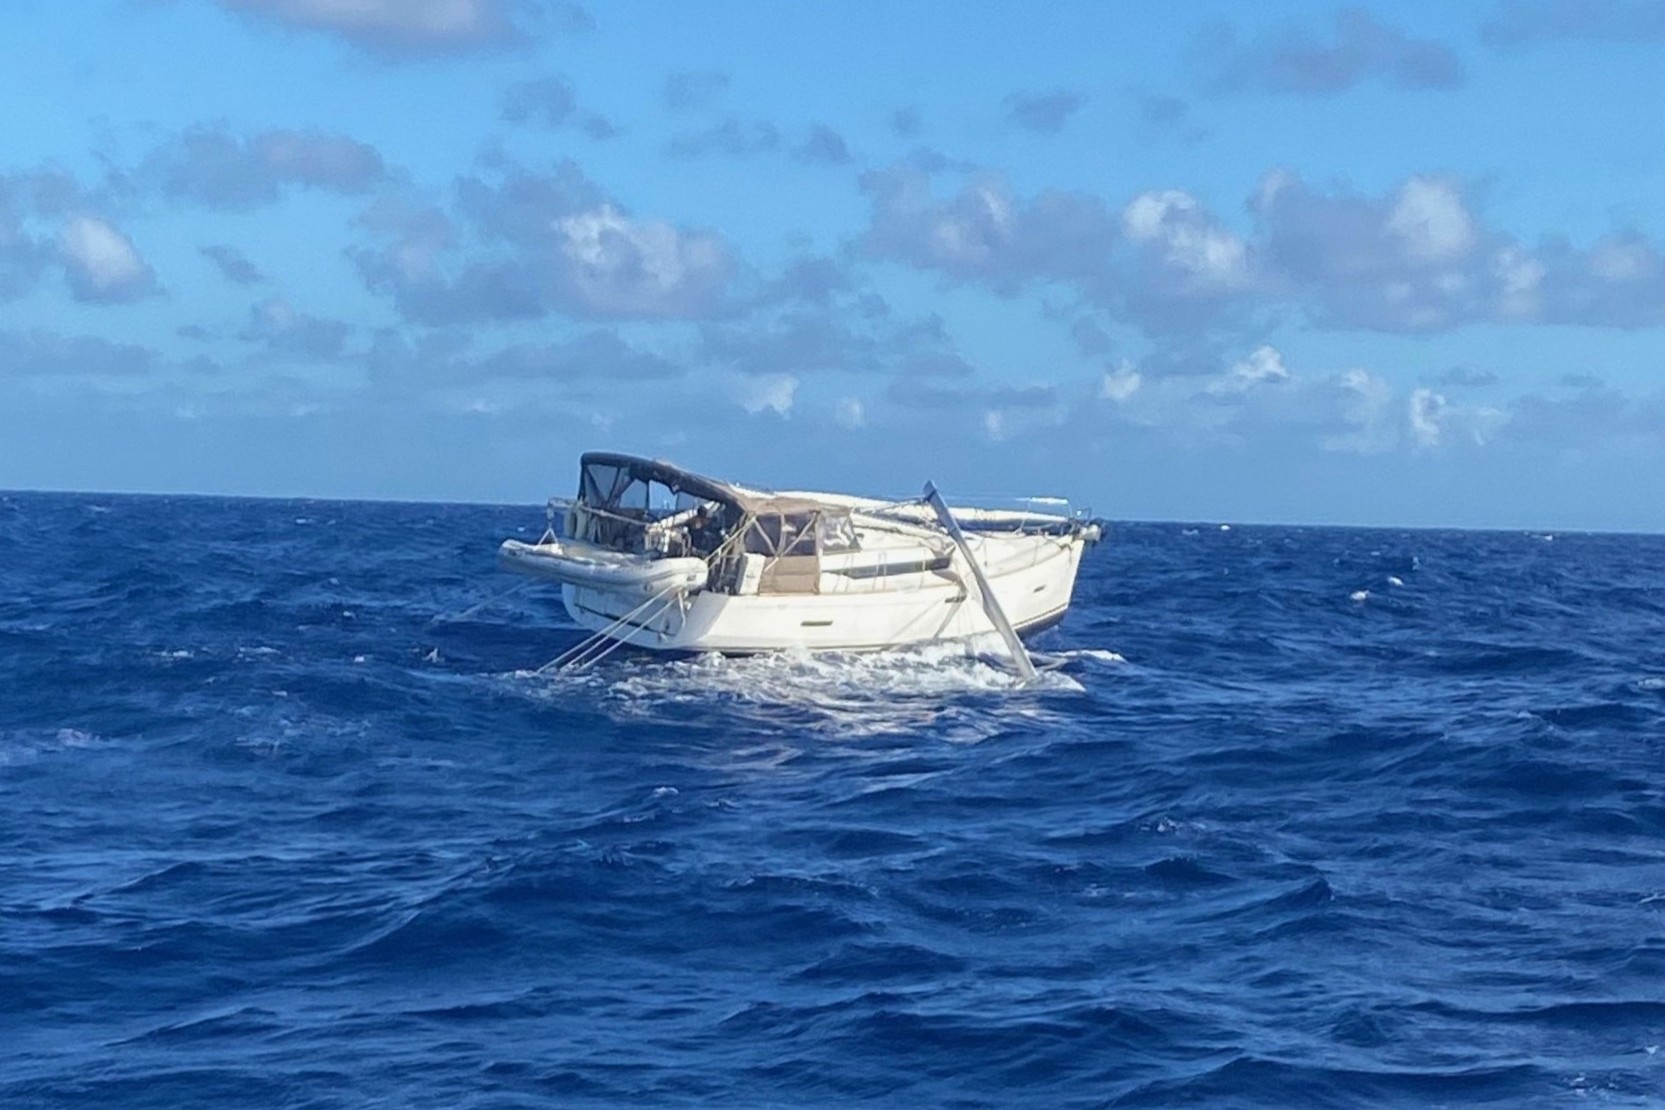
- The US Coast Guard assisted two sailors during a stern tow of their dismasted sailing vessel in the Atlantic Ocean (U.S. Coast Guard photo)
Why yacht rigs fail
The truth is most mast failures aren’t actually caused by the mast itself. Instead, they’re caused by smaller components of the rig that fail under load, such as turnbuckles, terminals, shrouds, rigging pins, split pins etc.
Here are some common sources of problems on yacht rigs.
- Corrosion, especially electrolytic/galvanic corrosion where stainless steel meets aluminum
- Improper assembly of mast components, i.e. shroud alignment!
- Overloaded furling systems, especially when sails are furled under too much pressure
- Bolts, pins and spreaders working their way loose
- Worn pins and terminals, including split pins being reused or not secured properly
- Cracked welds
- Corroded bolts
There is a huge amount of force that can be applied to the rig and even a single loose or ill-fitting bolt can compromise the entire system when it’s under pressure. Once the rig starts to flex in ways it wasn’t designed to, things can go wrong fast.
-

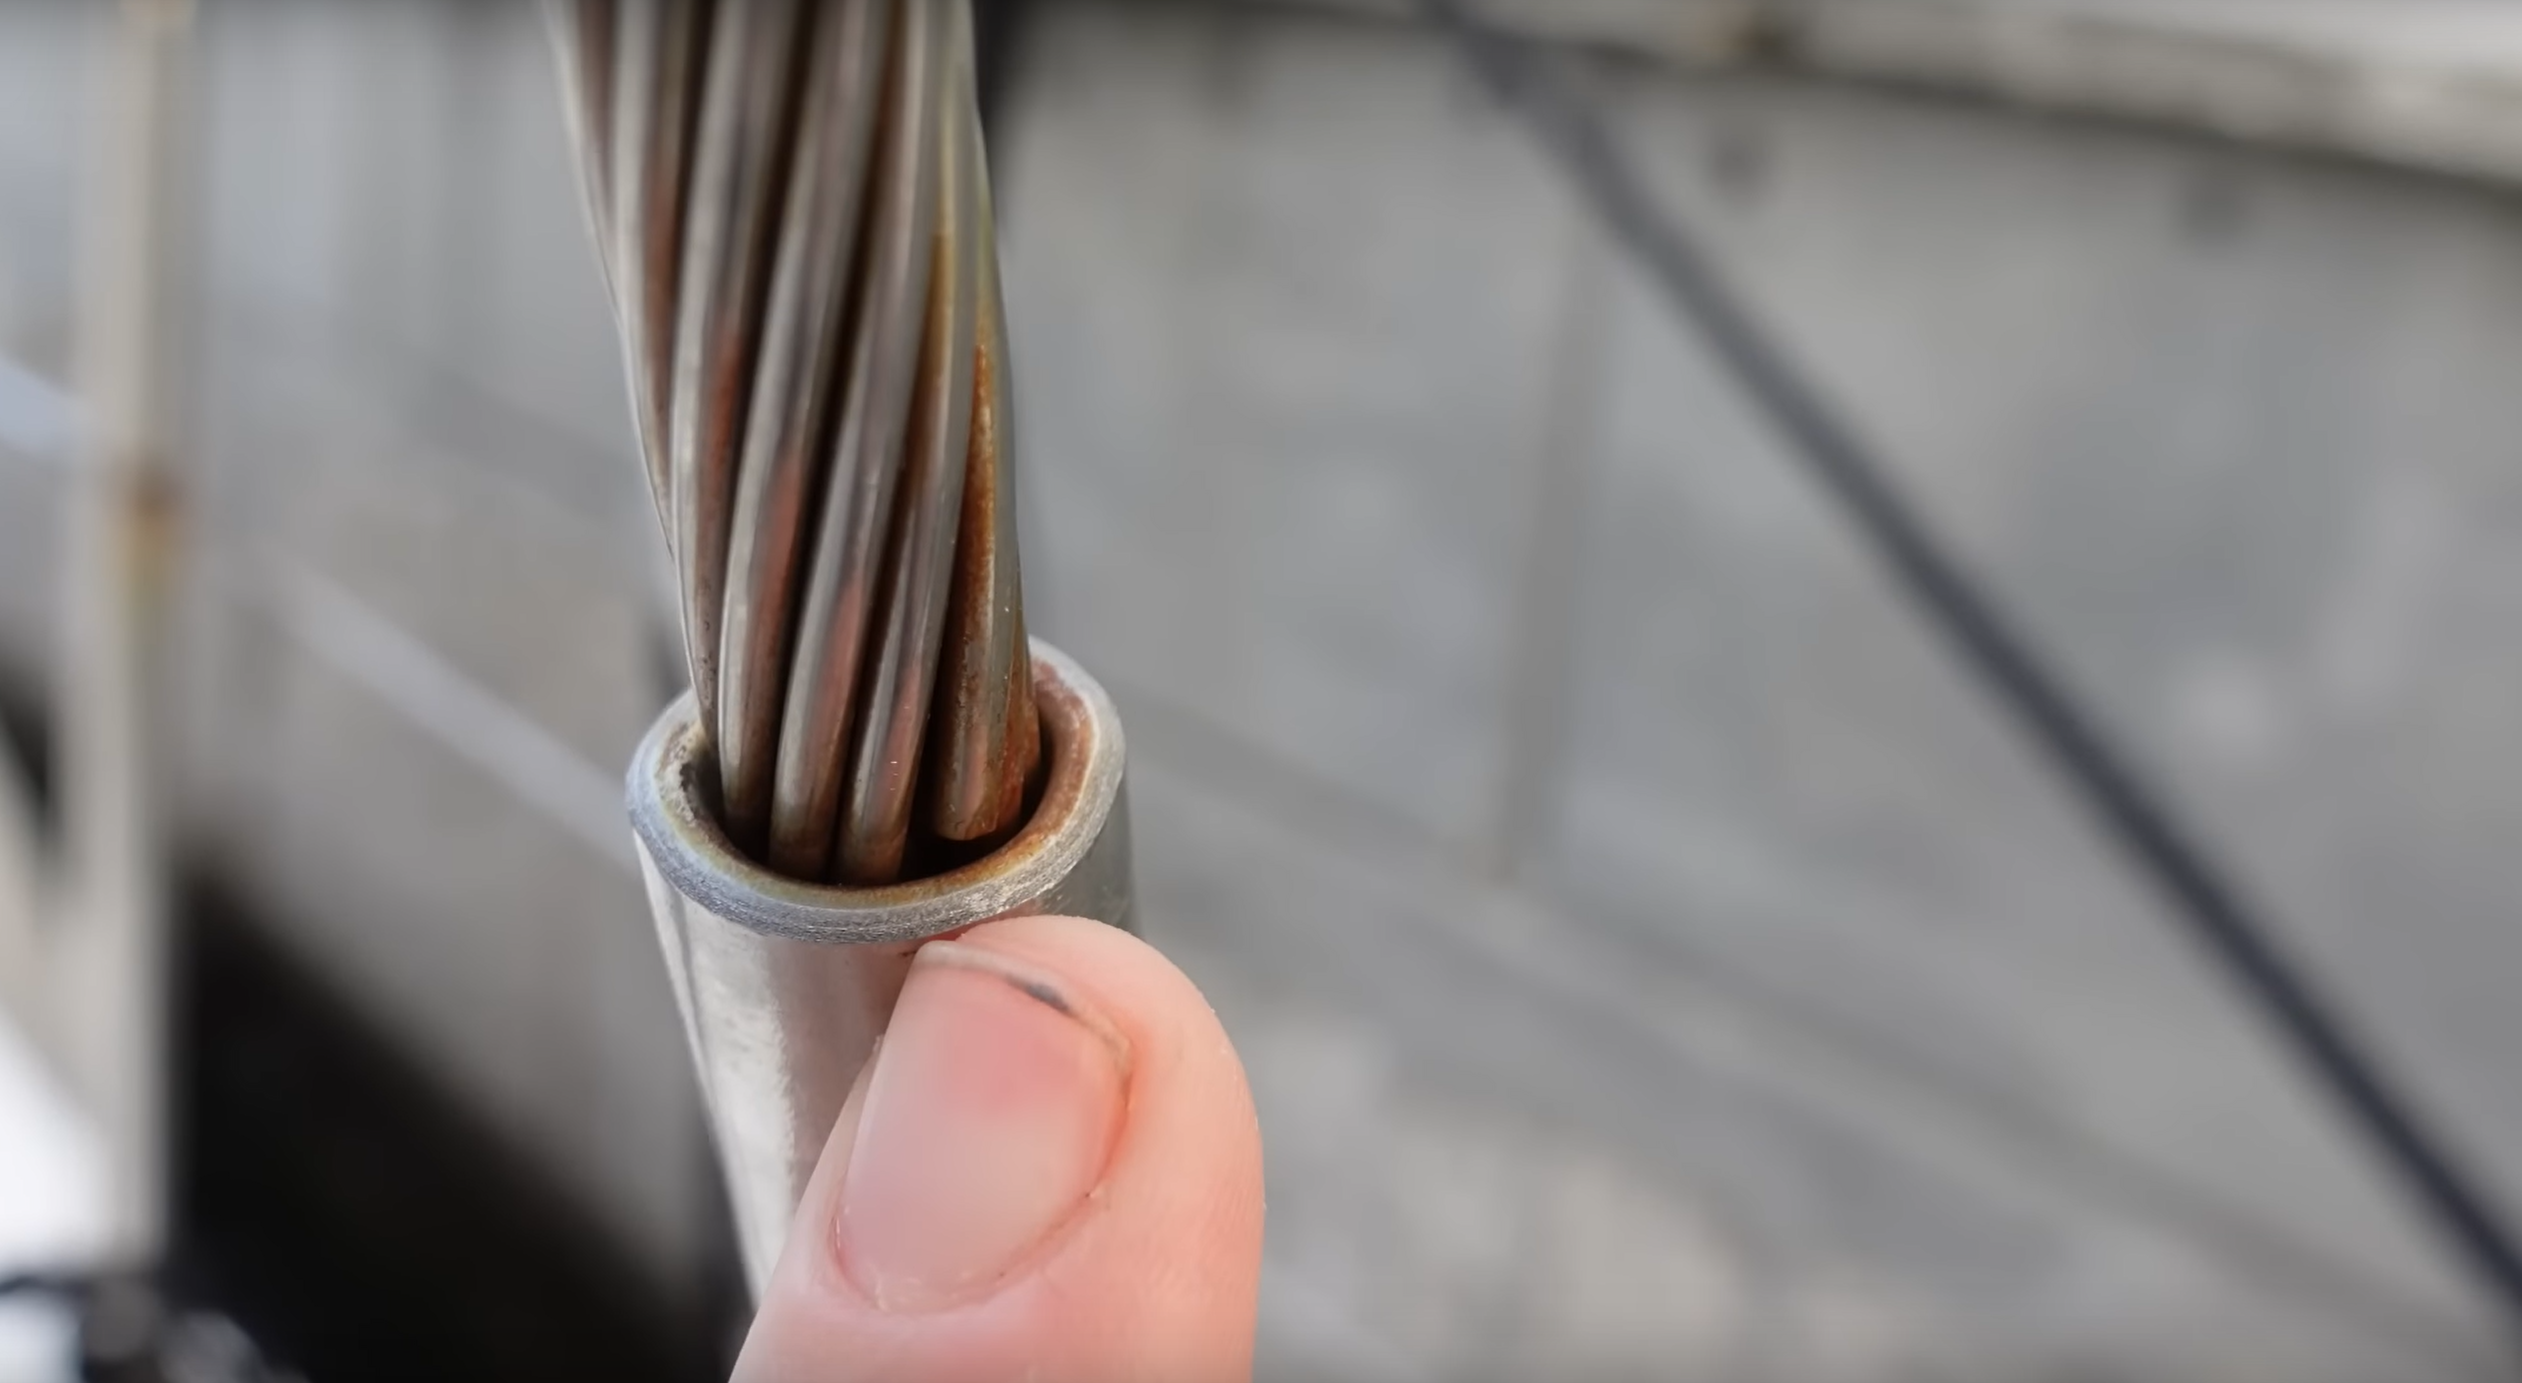
- This broken strand was noticed during a DIY rigging check
DIY rig checks on your yacht
You don’t need to be a rigger to perform basic rig checks, and as a boat owner it’s a good idea to know what to look for so you can try to identify issues early.
- At the mast base look for signs of cracking, corrosion or hairline fractures
- On the spreaders ensure bolts and connections are tight, checking for fatigue cracks or movement
- Check the boom hardware, looking at kicker straps, goosenecks, and end fittings for movement or rust
- Inspect the standing rigging for kinks in the wire, broken strands, or signs of UV damage to rope
- Watch for bending, hairline cracks, or signs of stress on the terminals
- Make sure the turnbuckle threads are clean and greased, and that the body isn’t deformed or rusting
- Replace bent or reused split pins and cotter pins, and always tape them to prevent snagging
When doing these checks the furling systems deserve special attention. The forestay inside a furling drum is under massive strain when a sail is rolled under load and if the wire starts to unravel or twist inside, failure can be sudden and catastrophic.
If you do notice any problems with the rig, or even have a suspicion that there may be an issue, be sure to act on it. The ocean’s tough enough without fighting a failed rig too.
-
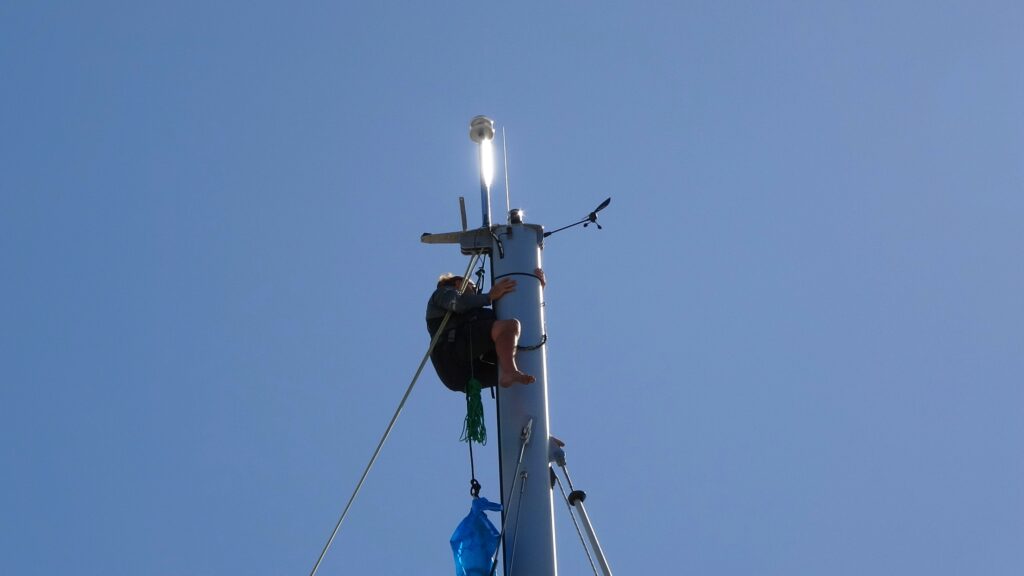
- Tye on SV Liger doing a top to bottom DIY mast check

Knowing when to call a professional
A professional rigger deals with rigs on a daily basis. They know which parts are under the most stress, the visual indicators of a problem, and many riggers also have specialised tools like a tension metre. Even if you’re comfortable doing your own inspections it’s best to schedule a full rig check at least every couple of years, more often if you sail hard, race regularly, or cruise long distances.
If you have a furling headsail, a rigger can also partially disassemble the system to inspect the forestay wire, which is usually not visible, and or impossible to check yourself.
It’s also a good idea to have the rig professionally tuned using a tension meter. Incorrect trim doesn’t just affect performance, it puts uneven loads on the rig and hull that can cause long-term fatigue or damage.
-

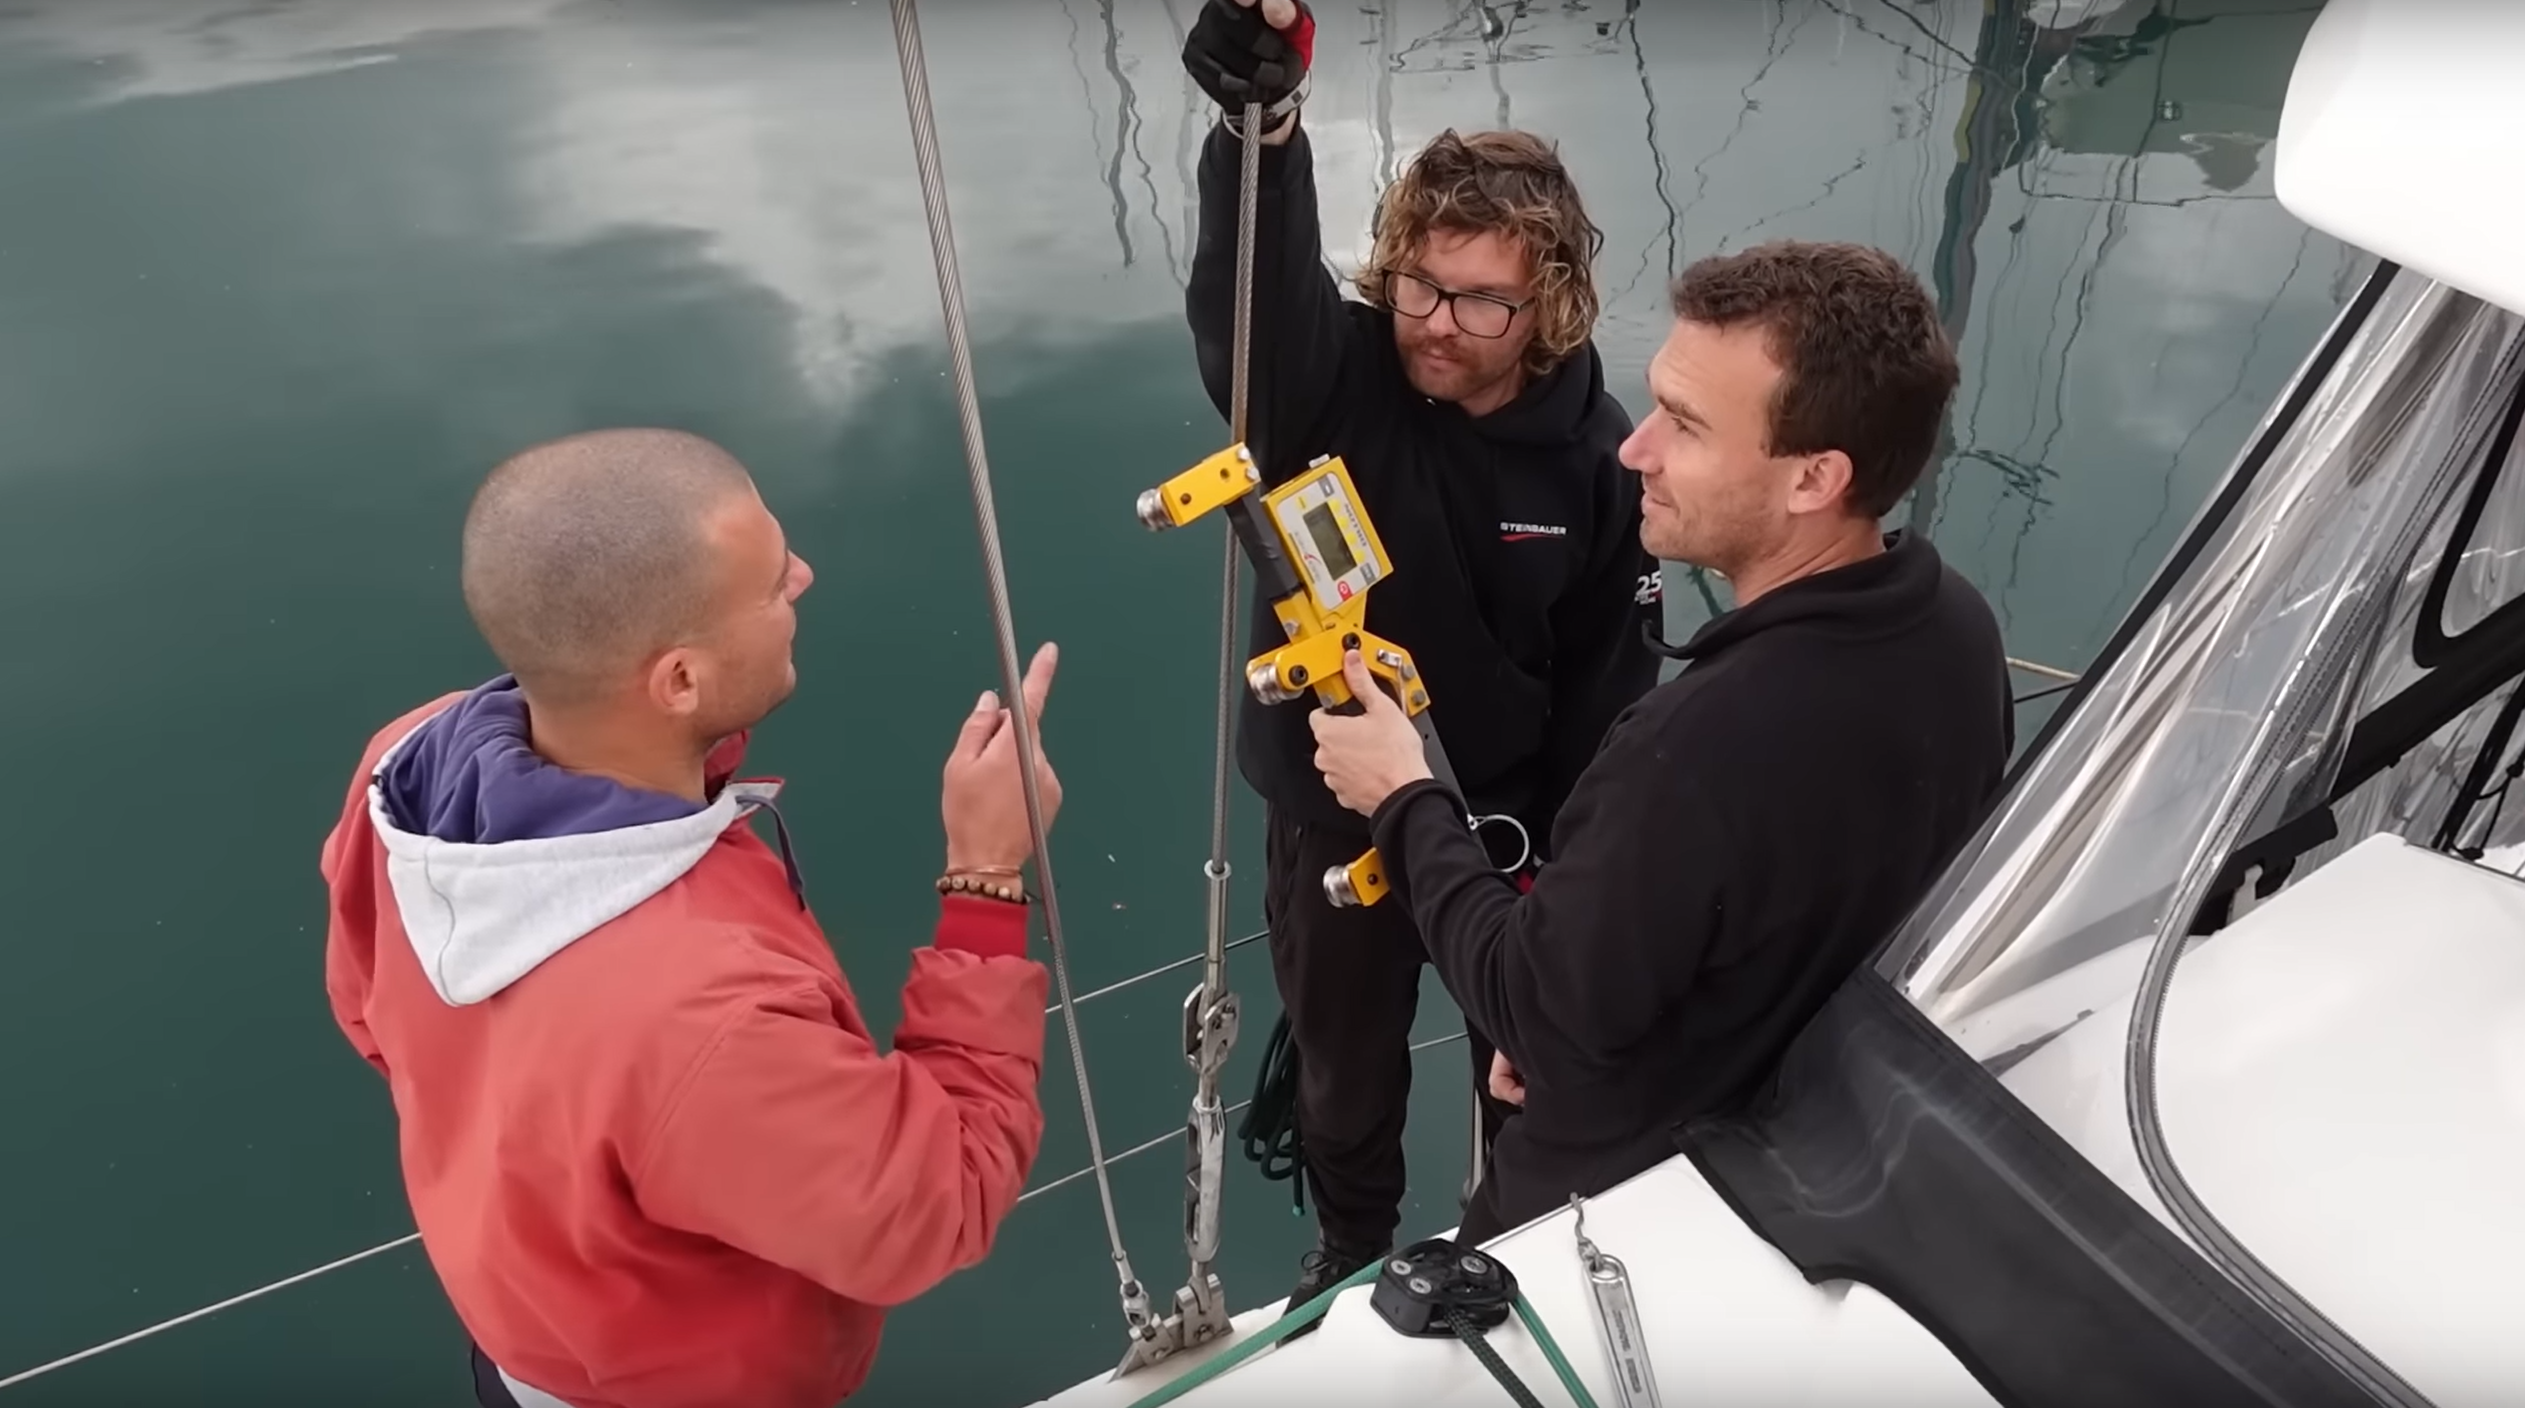
- Jean-Guillaume from ZSpars doing a rig check
Age of the rig
Rigs don’t last forever. Sun, salt, and load cycles all take their toll. If your standing rigging is more than 10 years old, it’s worth having a serious discussion with a rigger about replacement. Even if everything “looks fine,” metal fatigue and internal corrosion can build up unnoticed.
Replacing your rigging may seem like a big investment, but when compared to the cost of a dismasting, it’s money well spent.
An insurers perspective
As a yacht insurer, Pantaenius generally recommends an annual visual inspection of your rigging, either done by yourself or by a specialist. It’s advised that a thorough inspection by a qualified rigger be carried out at least every 4–5 years, and a complete rigging overhaul is typically recommended every 8–10 years. That said, the actual inspection intervals depend heavily on how, where, and how often your yacht is sailed.
Your insurer may have specific requirements, so it’s a good idea to read the policy conditions and check with them directly if you’re unsure. If you need help finding a specialist they may be able to help find one; our team at Pantaenius Australia is always happy to connect our cruisers with professionals we know and trust.
Final thoughts
A healthy rig is essential for safe passage, so don’t wait until something breaks. Build rig checks into your annual maintenance routine, and stay ahead of issues before they cost you more than just a day’s sail.
You don’t need to overhaul your whole rig every season, but you do need to know what to look for, when to call in help, and when to consider replacement.
If you have a tip or lesson learned about managing mast maintenance, be sure to share your experience in the comments. The best advice often comes from those who’ve been there and the noforeignland community is all about sharing information to help our fellow cruisers.


Thanks Michaela, that’s a useful update, and a reminder!
We carry a “Quick Dillon” digital rig tension meter on board Hawkeye because we find that many riggers don’t possess one.
We also have the new Cyclops rig tension sensors on our V1’s and D1’s so we our rig tensions are permanently displayed at both the nav station and on the flybridge.
Cheers
Richard
We’ve got a Dillon Quick Check aboard as well; we bought it in Italy after finding the local riggers didn’t have one to re-tension the rig after the mast had been off, instead relying on their “30 years of experience” to “feel” it… Now we’re in the Caribbean we’ve still found that even some of the most reputable companies don’t have a tension meter that can do the larger sized cables that we have on our catamarans, so go by feel. Glad we bought it and we’ve used it to check a few other catamarans over the years; some have been waaaaaay too tight/loose despite having recently visited a rigger.
We check our mast before and after every major passage plus at the start/end of a season. Having experienced past issues with a mast and having had friends be dismasted, it should absolutely be something that’s routinely checked and maintained 🙂 If you have a newer boat I think it’s worth asking the boat or mast manufacturer for a copy of the rigging tension specs.
Great article and reminder. Thank you. We also check our rig after every passage, but also every time we go up.